

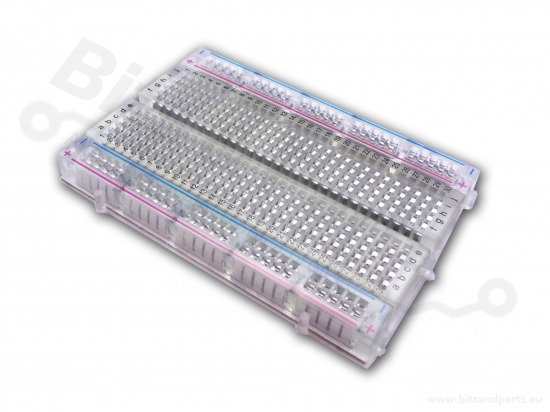
 A breadboard is an essential tool for hobbyists and electronics enthusiasts. With this handy board, you can easily and quickly build and prototype circuits without worrying about soldering or wiring. Whether you're a beginner or an experienced electronics designer, a breadboard provides the flexibility and freedom to test and develop your ideas. All breadboards are compatible with Arduino, ESP32, ESP8266, and Raspberry Pi projects. Order today and discover how easy it is to prototype with a breadboard!
Also, check out our starter kits with breadboards, jumper wires, and components.
Read here for our explanation about breadboards and how to use them.
-
Breadboard 1280/100 pins with connector buses
 Breadboard with 3 connection terminals on sturdy metal plate with rubber feet.
With 4 rows of 2x5x10 connections and 4 rows of 5x64 connections.
Dimensions: 22.0 x 15.0 cm
In stock -
Breadboard 16 pins (4x4) mini white
 Add a micro-slice standard solderless breadboard to your Perma-Proto or other perf-board. This 4x4 point solder-less breadboard is a good way to add some solderless prototyping space if you just need to have a couple of points.
Comes with one 18mm x 13mm x 10mm piece of solder-less breadboard. There are four white posts on the bottom for PCB posi... Adafruit Part number: 2463 -
Breadboard 170 pins black - universal experimenting board
 Breadboard 170 pins - universal experiment board.
Develop electronics projects without soldering!
This 170 pin breadboard will make your electronics hobby even more fun!
With self-adhesive back.
Easily interconnectable so you can continue to expand the breadboard.
Dimensions: 4.6cm x 3.3cm x 1cm In stock -
Breadboard 170 pins blue - universal experimenting board
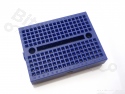 Breadboard 170 pins - universal experiment board.
Develop electronics projects without soldering!
This 170 pin breadboard will make your electronics hobby even more fun!
With self-adhesive back.
Easily interconnectable so you can continue to expand the breadboard.
Dimensions: 4.6cm x 3.3cm x 1cm In stock -
Breadboard 170 pins clear - universal experimenting board
 Breadboard 170 pins - universal experiment board.
Develop electronics projects without soldering!
This 170 pin breadboard will make your electronics hobby even more fun!
With self-adhesive back.
Easily interconnectable so you can continue to expand the breadboard.
Dimensions: 4.6cm x 3.3cm x 1cm
In stock -
Breadboard 170 pins green - universal experimenting board
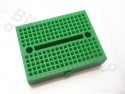 Breadboard 170 pins - universal experiment board.
Develop electronics projects without soldering!
This 170 pin breadboard will make your electronics hobby even more fun!
With self-adhesive back.
Easily interconnectable so you can continue to expand the breadboard.
Dimensions: 4.6cm x 3.3cm x 1cm In stock -
Breadboard 170 pins red - universal experimenting board
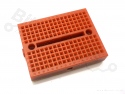 Breadboard 170 pins - universal experiment board.
Develop electronics projects without soldering!
This 170 pin breadboard will make your electronics hobby even more fun!
With self-adhesive back.
Easily interconnectable so you can continue to expand the breadboard.
Dimensions: 4.6cm x 3.3cm x 1cm In stock -
Breadboard 170 pins white - universal experimenting board
 Breadboard 170 pins - universal experiment board.
Develop electronics projects without soldering!
This 170 pin breadboard will make your electronics hobby even more fun!
With self-adhesive back.
Easily interconnectable so you can continue to expand the breadboard.
Dimensions: 4.6cm x 3.3cm x 1cm In stock -
Breadboard 170 pins yellow - universal experimenting board
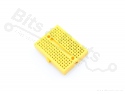 Breadboard 170 pins - universal experiment board.
Develop electronics projects without soldering!
This 170 pin breadboard will make your electronics hobby even more fun!
With self-adhesive back.
Easily interconnectable so you can continue to expand the breadboard.
Dimensions: 4.6cm x 3.3cm x 1cm In stock -
Breadboard 400 pins MB102 - universal experimenting board clear
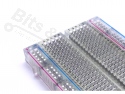 Breadboard 400 pins - universal experiment board.
Develop electronics projects without soldering!
This 400 pin breadboard will make your electronics hobby even more fun!
With self-adhesive back.
Easily interconnectable so you can continue to expand the breadboard.
Dimensions: 8.2cm x 5.5cm x 1cm
Color: transparent In stock -
Breadboard 400 pins MB102 - universal experimenting board white
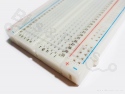 Breadboard 400 pins - universal experiment board.
Develop electronics projects without soldering!
This 400 pin breadboard will make your electronics hobby even more fun!
With self-adhesive back.
Easily interconnectable so you can continue to expand the breadboard.
Dimensions: 8.2cm x 5.5cm x 1cm
Color: white In stock -
Breadboard 70+410 pins - universal experimenting board
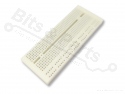 Breadboard 70+410 pins - universal experiment board.
Develop electronics projects without soldering!
This 70+410 pin breadboard will make your electronics hobby even more fun!
With self-adhesive back.
Dimensions: 11.8 x 4.5 x 9.0 cm
Color: white -
Breadboard 830 pins MB102 - universal experimenting board clear
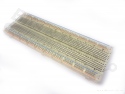 Breadboard 830 pins - universal experiment board.
Develop electronics projects without soldering!
This 830 pin breadboard will make your electronics hobby even more fun!
With self-adhesive back.
Easily interconnectable so you can continue to expand the breadboard.
Dimensions: 16.5cm x 5.5cm x 1cm
Color: clear In stock -
Breadboard 830 pins MB102 - universal experimenting board white
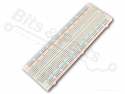 Breadboard 830 pins - universal experiment board.
Develop electronics projects without soldering!
This 830 pin breadboard will make your electronics hobby even more fun!
With self-adhesive back.
Easily interconnectable so you can continue to expand the breadboard.
Dimensions: 16.5cm x 5.5cm x 1cm
Color: white In stock -
Breadboard on base plate with connectors 2390 pins
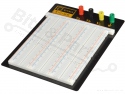 Breadboard on sturdy metal plate with 4 connection terminals in different colours.
- 3x contact terminal, 1920 contacts
- 5x distributor terminal, 500 contacts
- 4 pole connection terminals
- aluminum base plate
Dimensions: 235 x 185mm
In stock -
Breadboard power module MB102 3,3 / 5V - USB
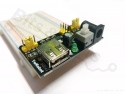 Handy power supply module for your MB102 breadboard. Press this module on your breadboard, connect power with a DC2.1 jack and you have all the voltages you need.
The power supply can provide 0.0, 3.3 or 5V voltage over 2 rails of your breadboard. You can set this per rail by means of a jumper.
The power supply itself also has header pins for 3.3V... In stock -
Prototyping platform acrylic for Arduino UNO
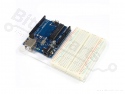 Set of an acrylic platform with screws, nuts and feet suitable for mounting an Arduino UNO and a 400 pin breadboard (not included).
In stock
Set of an acrylic platform with screws, nuts and feet suitable for mounting an Arduino UNO and a 400 pin breadboard (not included).
In stock
-
Set with 400 pins breadboard and power module MB102
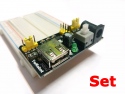 Set of a 400 pin breadboard and a power supply module MB102.
A great start to your electronics project!
Breadboard:
Breadboard 400 pins - universal experiment board.
Develop electronics projects without soldering!
This 400 pin breadboard will make your electronics hobby even more fun!
Dimensions: 8.2cm x 5.5cm x 1cm
Power module:
Handy power ... In stock -
Set wth 830 pins breadboard and power module MB102
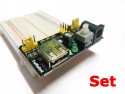 Set of an 830 pin breadboard and a power supply module MB102.
A great start to your electronics project!
Breadboard:
Breadboard 830 pins - universal experiment board.
Develop electronics projects without soldering!
This 830 pin breadboard will make your electronics hobby even more fun!
Dimensions: 8.2cm x 5.5cm x 1cm
Power module:
Handy power ... In stock


 Shipping costs Netherlands




 >
>
